Showing posts with label cotton and steel. Show all posts

Tuesday, 16 January 2018

A quilt for Franka

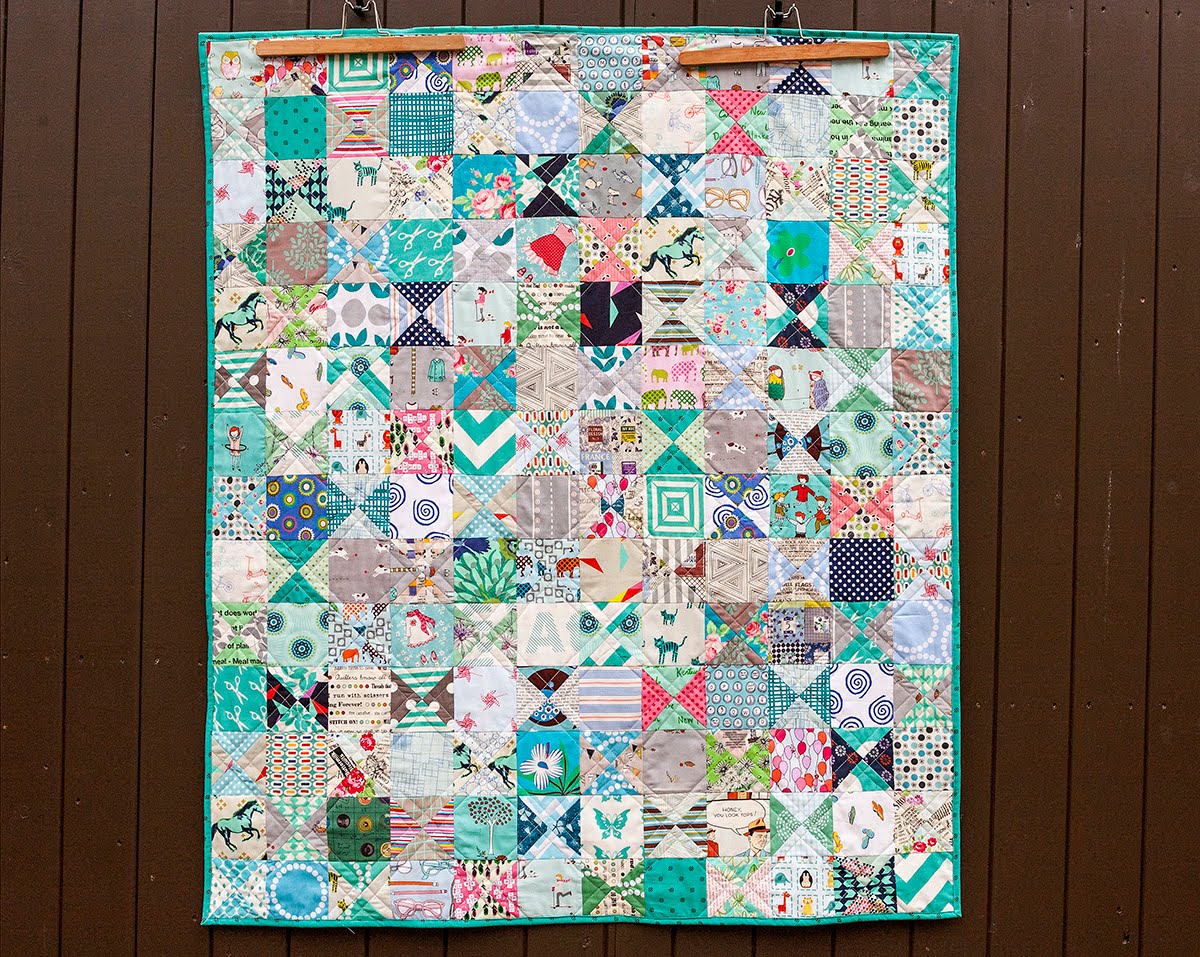
Hello and happy New Year 2018 to everybody. I started the year with a new quilt. My friend and college's daughter hit the big first birthday yesterday and that meant that a quilt had to be created. As everybody knows a baby or toddler needs at least one quilt to cuddle up under or to play with.


So I spend the last two weekends designing, choosing fabric from my stach, assembling, sewing, quilting. And what a joy it was. As you can see my colour theme is centred around the cool tonal range, such as turquoise, blue, grey with a dash of pink thrown in now and then for good measure.


I literally tore through my entire stash to hunt for suitable fabrics and for a while it looked like a bombshell in my studio but that is all part of the fun (though the folding and ordering of said bombshell not so much).


I chose the hourglass pattern intersected with simple squares and I made sure I had a good amount of "I spy" objects to keep the little one interested and entertained.


The finished squares are all 3 1/2 inches and I started the hourglass blogs with 5 1/2  squares to ensure I had enough to square off given that anything sewn on a bias seam is prone to distortion.
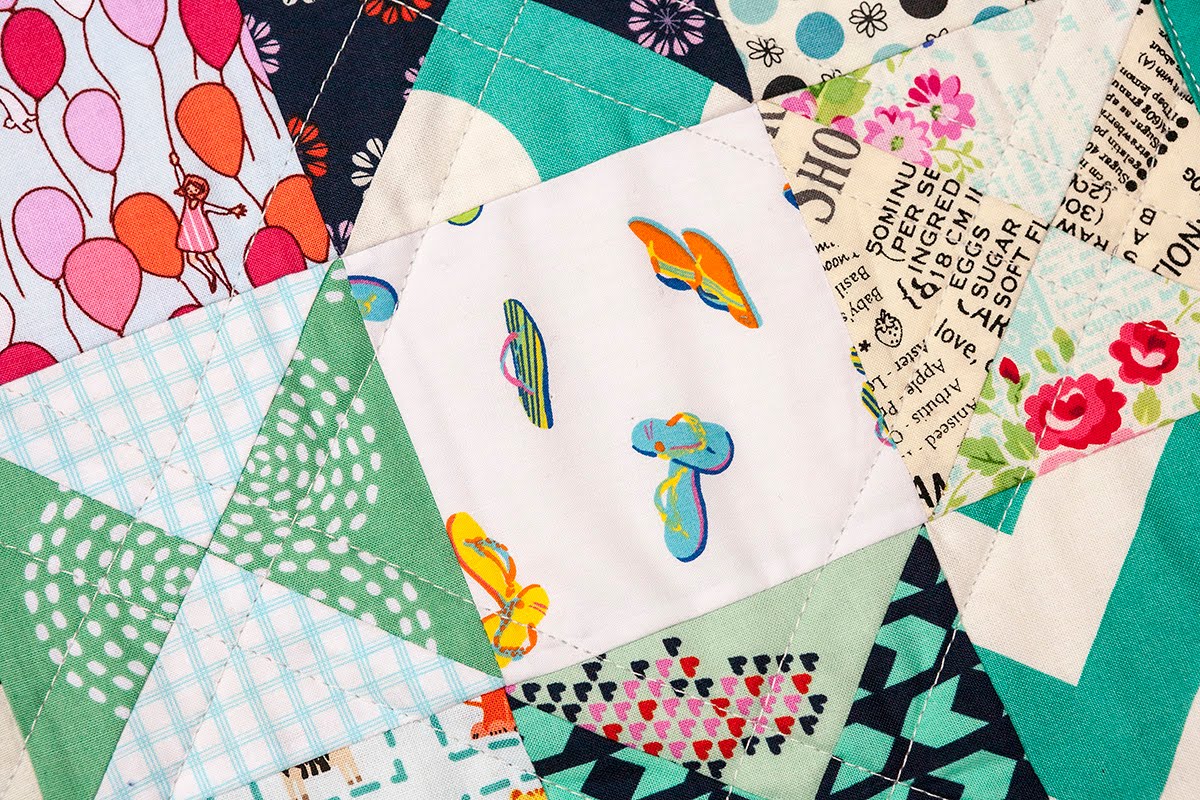


I had some of these fabrics for many years now. I remember buying the flipflop fabric when my sister still lived in Bremen and I would take my nephew out in the pram and we would always pop into this  fabric store on the way to the playground. He is now 9 years old and although this is more than 6 years ago he still remembers this.


And come Cotton & Steele cats can't be missed out on the quilt together with the horses and cheeky slogans....


....and dresses and dogs and little windmills and balloons....


The quilt is bound with a teal print that echoes the colours in the quilt and gives it a nice slightly darker frame and in addition works well with the back of the quilt.


The quilt is about 42" by 49" with 84 hourglass blocks and a similar number of simple squares. I can't quite remember the number of different fabrics I used but it is in the same region.

What a great start to the year.


Tuesday, 12 December 2017

Advent calender for my nieces - finished

As so often it was a rush in the end but I did manage to finish the 2nd of the Advent Calenders for my lovely nieces Sophia and Lily a few weeks back and they are now hanging in their respective rooms filled with treasures and raided with much anticipation every morning.


I really enjoyed making these and am very happy with how they have turned out, knowing they will bring them joy for many years to come. In fact my nephew for whom I made one in 2011 is now 9 years old and only recently started to feel a little to "grown up" for it. Frankly he used it way more years than I anticipated.

And with that I am singing off for this year and would like to wish everybody reading this blog a very happy Christmas and New Year and much creativity to come in 2018. Thank you for visiting and reading about my creative adventures.

Previous posts on the progress of the Advent Calendars calendars can be found here and here.

Saturday, 9 September 2017

Advent Calendar for my nieces - part 2-

The first calendar (for Sophia) is finished and it really wasn't as much work as I thought and it was enormous fun too.


But in order to reduce the workload I made a few clever decisions. I invested in plastic number and letter templates instead of creating templates myself which saved an enormous amount of time. I simply ironed bondaweb onto the wrong side of the fabric, placed the templates on the right sight, drew around it with a pen, cut them out with scissor and ironed them onto the 10 x 10 pre-cut fabric pieces. This part of the process took no more than 2 hours.
I bought the templates on ebay and they are really good, come in a box and are of course reusable for ever.


I then affixed the numbers and letters (again by machine) permanently with an appliqué blanket stitch. This took a little while of course but again not to bad and to be honest I wasn't going for perfection. 


The rest is  straight forward. I basically made a quilt using a light grey as background so that the coloured and patterned pockets contrast well and therefore stand out. I quilted it in 1/2 in straight lines and bound it in a turquoise fabric that is also from the Cotton & Steele Noel collection.

All pockets are lined to give them better structure and are attached to the quilt by machine. I sewed over the edges several times as I can imagine little hands grabbing them in a haste and I also think this quilt will be used as a quilt (not just a wall hanging) and toy a lot. After all 3 year old kids really don't care to much if this is a Christmas quilt or not. Imagine all the things you can put into all these pockets over an entire year.


I am already onto the quilt for Lily but am not sure if I finish it before my big trip to Japan. Let's see.

First post on this here.

Saturday, 12 August 2017

Advent Calendars for my nieces - part 1 -

I was going to start this blogpost by saying "It's that time of the year again..." but that would be just too depressing. Though it actually is and in particular for us crafters because making something for Christmas, be it something decorative or a present, takes time.

In 2011 when my lovely nephew was 3 years old I made him an Advent calendar made up of 24 miniature stockings. It was incredibly cute and a huge success and best of all it is still in use although he turned nice this year. That one I also started in the Summer with the intention to make a few stockings every months. In the end I made most of them in November by assembling a production line as it turned out this was a lot of work and a bit tidies too.


Fast forward 6 years and I have two new gorgeous nieces, Sophia aged three and Lily aged one. And both are in need of an Advent calendar. I spend a few weeks thinking and researching as I really don't want to make 48 miniature stockings (that might just push me over the stocking edge...), although they really would look great in their house hanging along he stairs. Sure I could not line the stockings , not quilt them, not add a cuff at the top but then they would look just boring...


So I decided on a different design altogether. During my search I found this gorgeous quilt advent calendar from Cynthia by Ahhh... Quilting and it immediatly hit home. It's a quilt with numbered pockets attached to it. Cynthia put a lot of work into her quilt with ribbons and gorgeous quilting too but I am going to make up my own version of this and keep it altogether a little simpler.  But for those of you who might want to follow her pattern, its on sale in her Craftsy shop. I am sure it is a great pattern but I just want to follow my own path and see where it takes me.

My other hope was to to make something that may not be as much work as the stockings were....well, I have given up on that hope...in for a penny in for a pound. And I don't mind because I think I am going to enjoy this very much.


The next consideration was what fabric to use. And as most manufacturer bring out their Christmas fabric in summer, bang on time Cotton & Steel released this years festive collection called "Noel". 

Its a super fun, contemporary take on Christmas and in style quite similar to the one I used for Hauke's stocking calendar. As much as I like Christmas, what I don't like are most of the fabrics with their dark tones and overly traditional patterns. So this fit the bill perfectly. I ordered at the Fat Quarter Shop a set of forty 10 x 10 squares which will be enough fabric to make forty pockets. I also ordered a half meter each of the "Snow Babies" in red and mint for the tree and 3 more half meters of some of the other patterns, two of which are for the binding and the rest for the tree stump and for the remaining 8 pockets and generally as spare fabric. I am adding solids from stach for the numbering and background fabric.


First up is Sophia's quilt. I was able to assemble the quilt including quilting very fast.  Essentially the tree is a simple triangle with a rectangle attached surrounding by solids. The numbers are (machine) appliquéd too. Next its on to making the pockets.

Happy crafting weekend.


Thursday, 4 December 2014

Twin quilts - a pair of finished quilts

The twin quilts my neighbors commissioned from me are finished and I think might already be on the way to their new owners.


The brief was to make twin quilts that are the same but different. So I used the same fabric (almost all from the 1st Cotton & Steel collection) but arranged them a little different for each quilt and my customer wanted the name of each of the girls embroidered on them. I think this is a really nice touch and will make them special for the little girls.


I quite enjoyed making these two little beauties and quilted with variegated threads  along the seam lines and added a few in between.

I love this colour combination with the pinks and yellows/mustard thrown in between. The dark blues add contrast and focus.


I added a spotty binding to each of them but again differentiated here and chose a yellow and a turquoise one.


The backs are solids with a little pieced strip of left over fabric to compliment the fronts.


So cute....


Wednesday, 5 November 2014

Twin quilts - a work in progress -

My lovely neighbours commissioned me a while back to make a set of quilts for twin babies recently born in the family. The quilts are supposed to be the same but different and should have each girl's name embroidered onto the quilt. I think that is a lovely touch indeed.


We worked the colour scheme out together. They wanted pinks of course, and some purples but also yellows and some contrasting colours that produce impact. That's when it hit me that my recently purchased bundles from Cotton & Steel were perfect in that I could literally choose from all three bundles as they are all colour coordinated.
I only added two other prints from stock, a dotty number from K. Fassett and the measuring tape fabric. I was able to include the lovely cats from the Hatbox collection and also the horses from the Mustang collection and they do look as if they are galloping through the quilt.


One down one more to go and then comes my favourite part which is quilting of course.


Monday, 27 October 2014

Stash Note 94

Freshly back from a much needed holiday in Sicily I thought it might be a nice idea to share with you some newish fabric I have added to my stash. Newish because I have had the fabric a while and because everybody has been talking about them for months now, I thought I leave the blogging about it for a bit.

Mustang


I am of course talking about the new fabric designer "shop" of Cotton & Steel. The designers debuted their first collection at Spring Market and I believe their second is a major magnet at the fall market.


Moonlit
I ordered three of the collections and whilst I am obviously impressed with each of them I was particularly taken by the fact that they are all coordinated.

Hatbox
This fact only hit me when I was asked by my lovely neighbour to make twin baby quilts for her to gift to a relative. The twins are girls and she requested colours of pink, purple, yellow and whatever else I thought would work with it.


I had my package of Cotton & Steel lovelies sitting on a shelf and wasn't really sure what to do with them to be honest...that is until this commission came in. So I grabbed the entire stash and sorted out all the relevant colours and that is when it hit me how wonderfully colour coordinated they are. It was a breeze to put something pleasing together.


The fabric is cut and ready to be sewn into two quilt tops that are the same but different. Watch the space....